

Regular maintenance of your vehicle is essential to ensure its longevity and optimal performance. One of the most critical aspects of this upkeep is the need to change your oil. Neglecting this task can lead to engine wear, decreased efficiency, and expensive repairs. In this guide, we will take you through the process of changing your oil step by step, making it easy for even beginners to follow along.
Understanding the importance of oil changes is crucial for any car owner. Oil serves as the lifeblood of your engine, lubricating moving parts, reducing friction, and preventing overheating. By following our detailed instructions, you can take control of your vehicle’s maintenance and contribute to its overall health and performance. From gathering the necessary tools to disposing of used oil properly, we will cover everything you need to know to successfully change your oil.
Whether you’re looking to save money on service fees or just want to gain hands-on experience with your car, this step-by-step guide to changing your oil will empower you to perform this essential task with confidence. Let’s get started on keeping your engine happy and healthy!
Gathering Necessary Tools and Materials for an Oil Change
To successfully perform an oil change, it is essential to gather all necessary tools and materials beforehand. Preparation not only ensures a smooth process but also enhances the effectiveness of your maintenance routine.
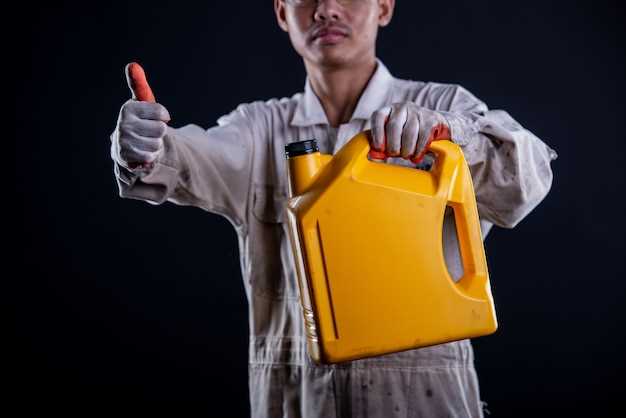
The first item on your list should be the appropriate oil for your vehicle. Always refer to the owner’s manual to determine the correct oil type and viscosity. This information is crucial, as using the wrong oil can lead to engine damage.
You will also need an oil filter specific to your vehicle make and model. Replacing the oil filter during an oil change is vital for maintaining engine health, as it traps contaminants and prevents them from circulating in the engine.
Next, gather basic tools required for the task. A socket wrench set is essential for removing the oil drain plug. Ensure that you have the correct size socket to avoid stripping the bolt. Additionally, an oil filter wrench will facilitate easy removal of the old oil filter.
An oil catch pan is necessary to collect used oil. This prevents spills and helps in the responsible disposal of old oil. Alongside this, a funnel will assist in pouring new oil into the engine without creating a mess.
Employing a pair of gloves is wise to keep hands clean and protect skin from oil and other contaminants. Having rags or paper towels on hand will further aid in cleaning any accidental spills.
Lastly, a jack and jack stands or ramps can be beneficial if your vehicle does not have sufficient clearance to access the oil drain plug. Ensure these tools are rated for your vehicle’s weight to ensure safety during the maintenance process.
By gathering the necessary tools and materials before beginning your oil change, you set the stage for a more efficient and effective maintenance task, ultimately contributing to the longevity of your vehicle.
Step-by-Step Process of Draining Old Oil and Adding New Oil
Changing your oil is a crucial part of vehicle maintenance. Properly draining old oil and adding new oil ensures your engine runs smoothly and efficiently. Follow these steps for a seamless process.
First, gather all necessary tools and materials. You will need an oil pan, wrench set, new oil filter, new oil, a funnel, and a jack or ramps to elevate the vehicle. Ensure the engine is warm but not hot, as warm oil drains more easily.
Begin by securing the vehicle. Use wheel chocks and turn off the engine. Once the vehicle is safely elevated, locate the oil drain plug underneath the car. Place the oil pan underneath the plug to catch the old oil.
Using the appropriate wrench, carefully loosen and remove the drain plug. Allow the old oil to completely drain into the pan. This may take several minutes. While the old oil is draining, you can proceed to change the oil filter.
Locate the oil filter, typically situated near the engine’s oil pan. Use an oil filter wrench to remove the old filter. Before installing the new filter, apply a small amount of new oil to the rubber gasket on its rim. This ensures a better seal and makes future removal easier.
Install the new oil filter by hand, tightening it firmly but avoid over-tightening. Return to the oil drain plug and reinstall it securely once all the old oil has drained out. Make sure to clean around the plug to prevent any debris from entering the engine.
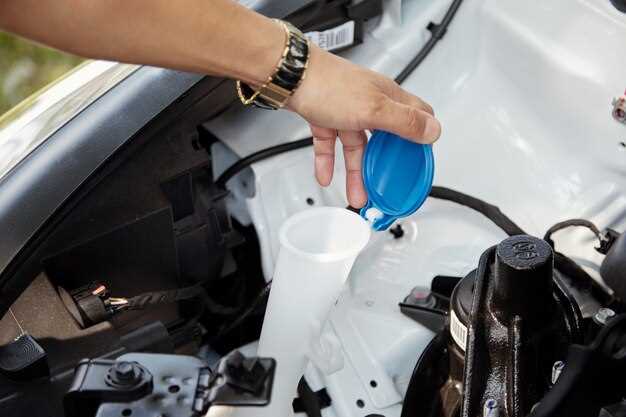
Now, prepare to add new oil. Consult your vehicle’s manual for the type and amount of oil required. Remove the oil fill cap on top of the engine and use a funnel to pour in the new oil slowly. Check the dipstick periodically to avoid overfilling.
Once the desired amount of new oil is added, replace the oil fill cap. Start the engine and let it run for a minute, allowing the new oil to circulate. Check for any leaks around the oil filter and drain plug. After that, turn off the engine and check the dipstick one last time to ensure the oil level is correct.
Finally, dispose of the old oil and filter responsibly. Many auto parts stores and service stations offer recycling services for used oil. Regular maintenance, including oil changes, is essential for prolonging your vehicle’s lifespan and ensuring optimal performance.
Disposal of Used Oil and Maintenance Tips for Longevity
After completing an oil change, proper disposal of used oil is essential. Never pour it down the drain, in the ground, or in regular trash. Instead, store the used oil in a clean, sealed container to prevent leaks and spills. Many auto parts stores, repair shops, and recycling centers accept used oil for recycling. Some local municipalities also have designated collection events for hazardous waste, including used oil. Make sure to check local regulations to find the most suitable disposal options available in your area.
Regular maintenance is key to prolonging the life of your engine and ensuring optimal performance. Follow the manufacturer’s recommendations for oil change intervals and types of oil compatible with your vehicle. Regularly inspect oil levels and look for signs of contamination, such as a dark color or a burnt smell. Consistent oil changes prevent sludge buildup and maintain engine cleanliness.
Additionally, consider using a high-quality oil filter during each oil change to improve filtration efficiency. Always check for leaks around the oil filter and drain plug after completing an oil change to avoid potential issues. Finally, maintaining proper engine temperature and monitoring coolant levels can prevent overheating, which in turn supports the longevity of both your oil and engine.


